Monday, March 16, 2015

March 2015 IPSY Bag Unboxing!


Hello readers! Today I am going to write my first post on the monthly subscription bag known as IPSY. I am sure everyone by now has heard about this subscription, however if you have not its pretty much a subscription service which costs $10 per month and it comes with 4-5 beauty products some are full sized and some are deluxe samples. This month's bag theme was floral fantasy which is very suitable since spring is upon us now here in the states. After breaking each product down the total value of the bag came out to be $28.49, now I will say that some months the actual value of the bag is much higher than $28 and sometimes its not it really just depends but the actual value will always be more than the $10 you pay for. I was extremely happy with this months bag I will definitely use all of the products, I do wish I got the cleanser that some people got this month however none the less this bag was a good one! It came in this cute blue-teal bag with huge floral prints on it, there was yellow sewing on the top it was just a nice girly bag. 


Crown Brush Infinity Shadow/Crease Duet Brush:


$6.99


Skyn Iceland hydro cool firming eye gel:

Individually they are $3.75, together their value is $7.50


NYX Butter lipstick in the shade Hunk:

$6.00


Coolway Glow Oil treatment for hair:

 This is a sample size so I am going to approximate that this would cost roughly $4, since the full size is $30


Pixi by petra mineral eyeshadow duo in Apricot Glow: 

Around $4 dollars would be the value, it is just a sample size

Sunday, January 4, 2015

DIY Crate Boxes

I have been on a DIY kick this past winter break, and my most recent project has been converting these crates into decor pieces for my room. Now crates are something you can do so so so much with. I have seen people use them as book shelves, storage units, bathroom decor pieces, etc. If you google or Pinterest any DIY for crates you get so many options, and I definitely recommend going through them. My idea is simple and easy, and will probably not take you more than an hour to do. Enough banter let me show you how I converted these simple crates to cute room decor pieces for a fairly cheap price! 


Supplies:
-Two small wooden crates (purchased from Michael's on sale for $3)
-Spray paint, you can use any color I chose brown ($3 from Walmart)
-Paint
-Paintbrushes
-Random Misc items to put in crate


For the setup, since I spray painted I went outside so the smell wouldn't spread through my house. I took an old shower curtain which was dirty from previous art projects as my surface to spray paint on. 


 I coated the front and the sides of the crates about 2 times to get a nice dark brown coat. I did not spray the back of the box because it is going to be covered by the wall, so its kind of a waste.


In a disposable plate I squeezed out some dark brown paint to paint on the sides of the crate, to give it an old tattered look. This is an optional step but I loved how it turned out, and I painted it by randomly stroking the paintbrush on different parts of the crate. 


 Now it is upto you on what you would like to put in the crates. I took a mason jar stuffed some red wrapping tissue paper in it and some fake flowers, I then placed two candles on its sides. I have seen people place old clocks, picture frames, and books in their crates so this is where you can get creative!


 I hung them up on my wall by nail, however you can use adhesive tape along with double sided tape to prevent damaging your walls.

For the second crate I placed a chalkboard (which I also DIYed with chalk paint) along with a beaded chain wrapped on the side of the crate, along with a few pieces of chalk.


If you try this project let me know, and remember to have fun!

Tuesday, December 23, 2014

Sephora Beauty Haul!

Some damage was definitely done when Sephora sent our their holiday coupon for their beauty insider card holders. I loved all my purchases, and wanted to share my goodies with you guys, enjoy!

Josie Maran Coconut Watercolor eyeshadow
Color: Rio de rose gold

 Soap & Glory hand cream 
 MUFE eyeshadow
Color: I-606 
 Origins Ginseng Eyecream
 Elizabeth & James rollerball perfume duo
I love these scents!
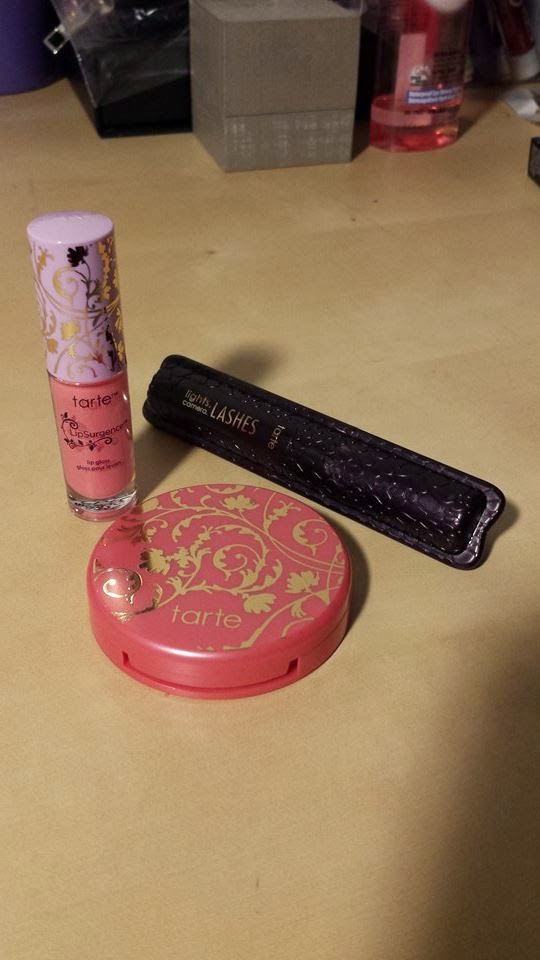
Tarte little mini gift set (Only $10!)
Blush-Magic
Mascara-lights, camera, lashes
Lipgloss-Magic
 Even though they are mini sized the blush is worth the money its a very acceptable size
 Origin Skincare trio
Clear Improvement Active Charcoal Mask
Modern Friction Nature's gentle dermabrassion
Drink Up Intensive Overnight Mask

Monday, December 22, 2014

Abandoned Warehouse Shoot

Over the weekend, me and a few of my friends decided to have an all black photo-shoot in an abandonded warehouse since we are all wanna be hipsters and honestly photoshoots are hell of a lot of fun! Granted it wasnt all black, since a few of the girls decided to wear white or maroon, and on a side note the inspiration for this shoot was based off of Solanges wedding photo (*wink*).


Outfit Details:
Black dress: Urban Outfitters
Jeggings: Local Boutique
Shoes: H&M
Penny Board: A priceless gift

Sunday, August 31, 2014

DIY TOMS!

So I love Toms just like everyone else obviously, however one day I spilled some bleach on my gray toms and it left a pretty off looking orange blob on my shoe. And later on my right shoe got some black smudges on it to that wouldn't budge when I tried to clean them, so I thought its time to bring out my art bin and get crafty with my toms! I looked up a bunch of tutorials and saw some really pretty designs however there was this one pair of toms that had a henna inspired design on it and I fell in love with it! I will insert that image below as well as my spin on the idea, and how I customized my toms :) Enjoy!


So the tools you will need to do this are as follows:

1. Sponge brushes


 2. Some sort of water sealant, such as Mod Podge but you can use which ever one you have


 3. A black sharpie, and thin paint brush


 4. Acrylic paint or fabric paint, I used acrylic
 I used the mustard and white color in my paint kit
5. Painters tape 

So, to actually list my steps I first started with using the painters tape and taped around the bottom rim of shoe and covered the toms label on the back and the flap label on the sides.
      Before Toms

 First step: Cover bottom and labels with painters tape


 Second step: I mixed my preferred choice of paints in a disposable plate and started to apply the color onto my shoes with the foam paint brush


 I did a total of 2 coats of paints and this is what it looked like after I was done


 Third step: I filled in my little triangle on the top of the shoe with a white color paint with the smaller paintbrush and removed the painters tape


Fourth Step: So now its the fun part, I took my sharpie and just started doodling designs onto my dry painted toms I suggest pulling up pictures of patterns you like.  I only drew on the top half of my toms not the sides or front toe part. The picture I was inspired by is below:  
Fifth Step: After you are done drawing just paint on the sealant all over the shoe and let it dry for a few hours.
 After that you're done! Here is the final product:


Lots of love~Saria